
Finally, the day has come when you got your hands on your new bike or you finally decided to take your bike for a long-distance ride, and now maybe you’re wondering, “What riding gears do I need? Which bike accessories do I need to buy? How should I plan my route? What should be my budget for the trip?” Don’t worry, I’ll help you through my experience on how to start bike touring for the first time.
When I started my riding journey, I was in a similar situation: excited and confused. I didn’t know anything about riding for long distances. I was ready to go for a ride without any safety gear, fortunately my ride got delayed and I got the opportunity to do some research and buy myself a riding jacket, pants and gloves.
In this blog, I will guide you through each aspect, whether it’s convincing your parents, planning your tour, or preparing your body for a long ride.

How to start bike touring as a beginner
Let’s start with preparing your bike for touring.
When it comes to preparing your bike for touring, questions like what accessories do I need? “Do I need to learn bike repair skills? Which luggage is best for me?” arise in our minds.
Bikes are your best friend when it comes to long-distance touring, so it becomes a necessity to look after your bike. So what do you need to do?
Regular Servicing
Make sure that your bike is serviced at regular intervals and that all the necessary items, such as engine oil, an oil filter, an air filter, and the bike’s coolant, are replaced. Also ensure that your bike’s chain is properly lubed from time to time and that its electrical components are functioning properly. If your bike is new, then ensure that you commence long-distance riding after the 1st service, which is usually due after it finishes its running-in period, which is generally between 300 and 500 kilometers, or 45 days, whichever is earlier (please read your bike’s manual to get the actual service due date).
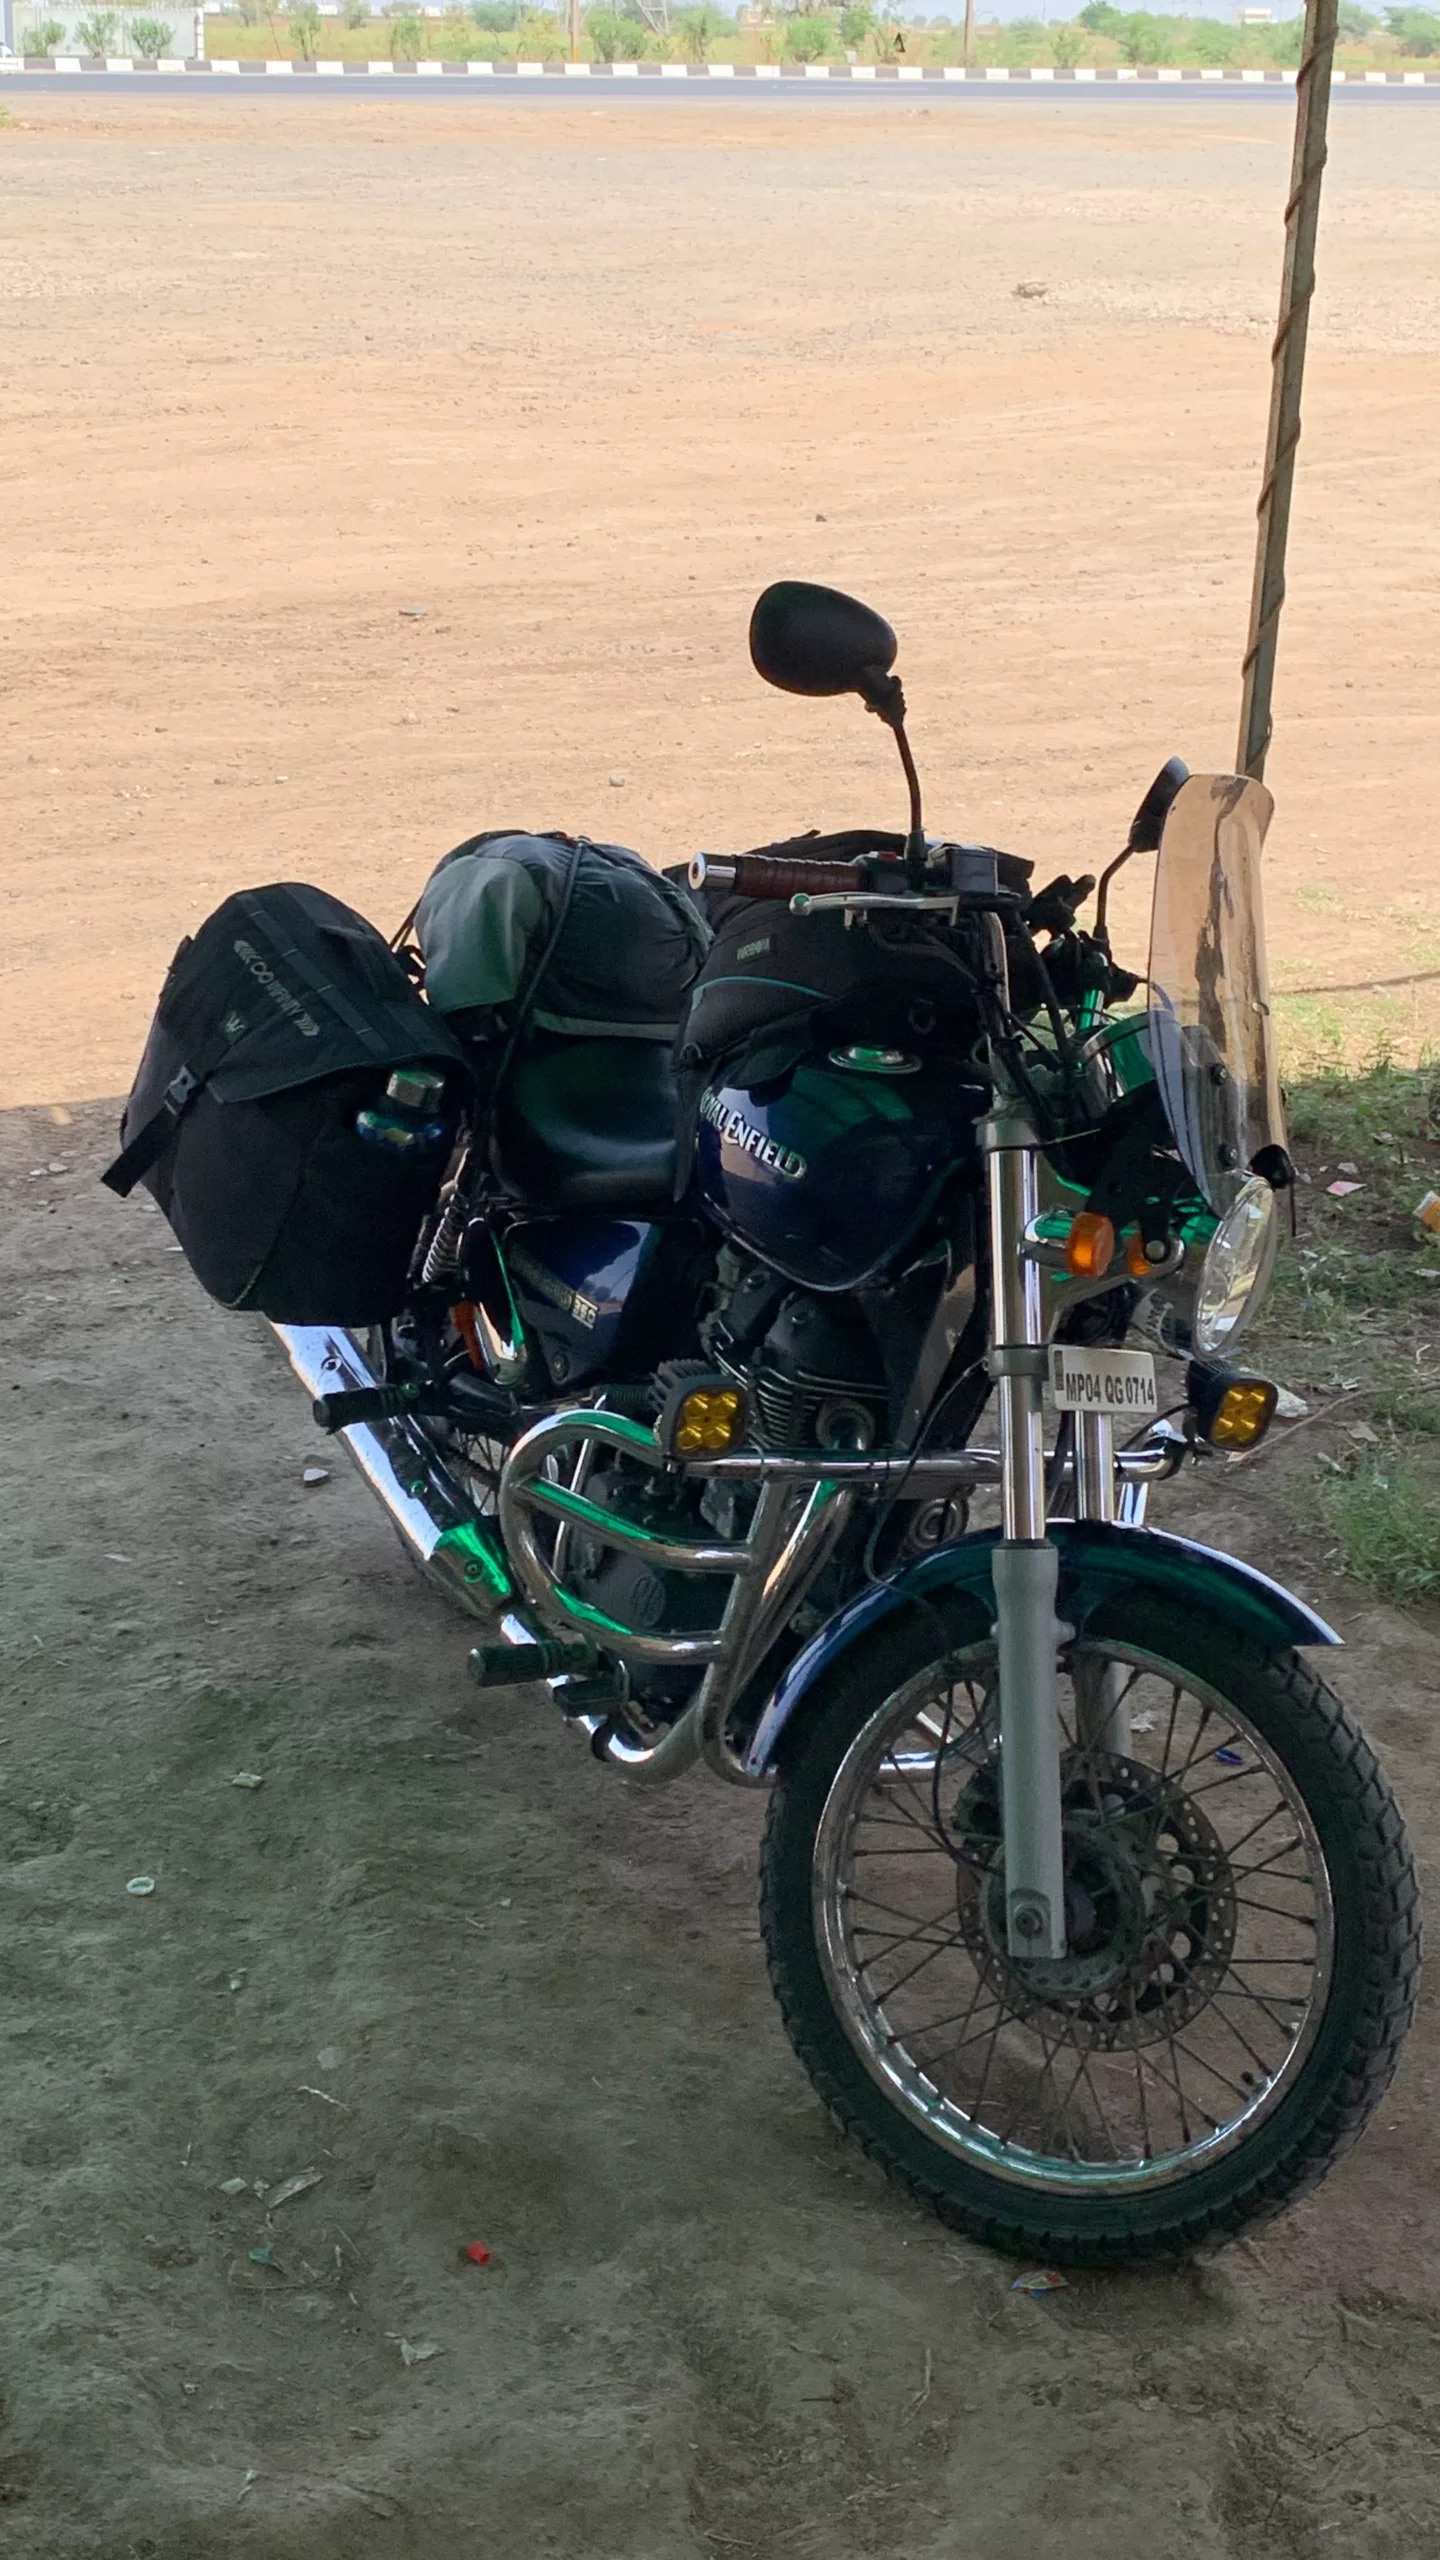
Basic bike accessories
So the next question is, “What bike accessories do I need for touring?” Well, there are multiple accessories that you can buy for your bike based on necessity or comfort. Here is what I use and recommend:
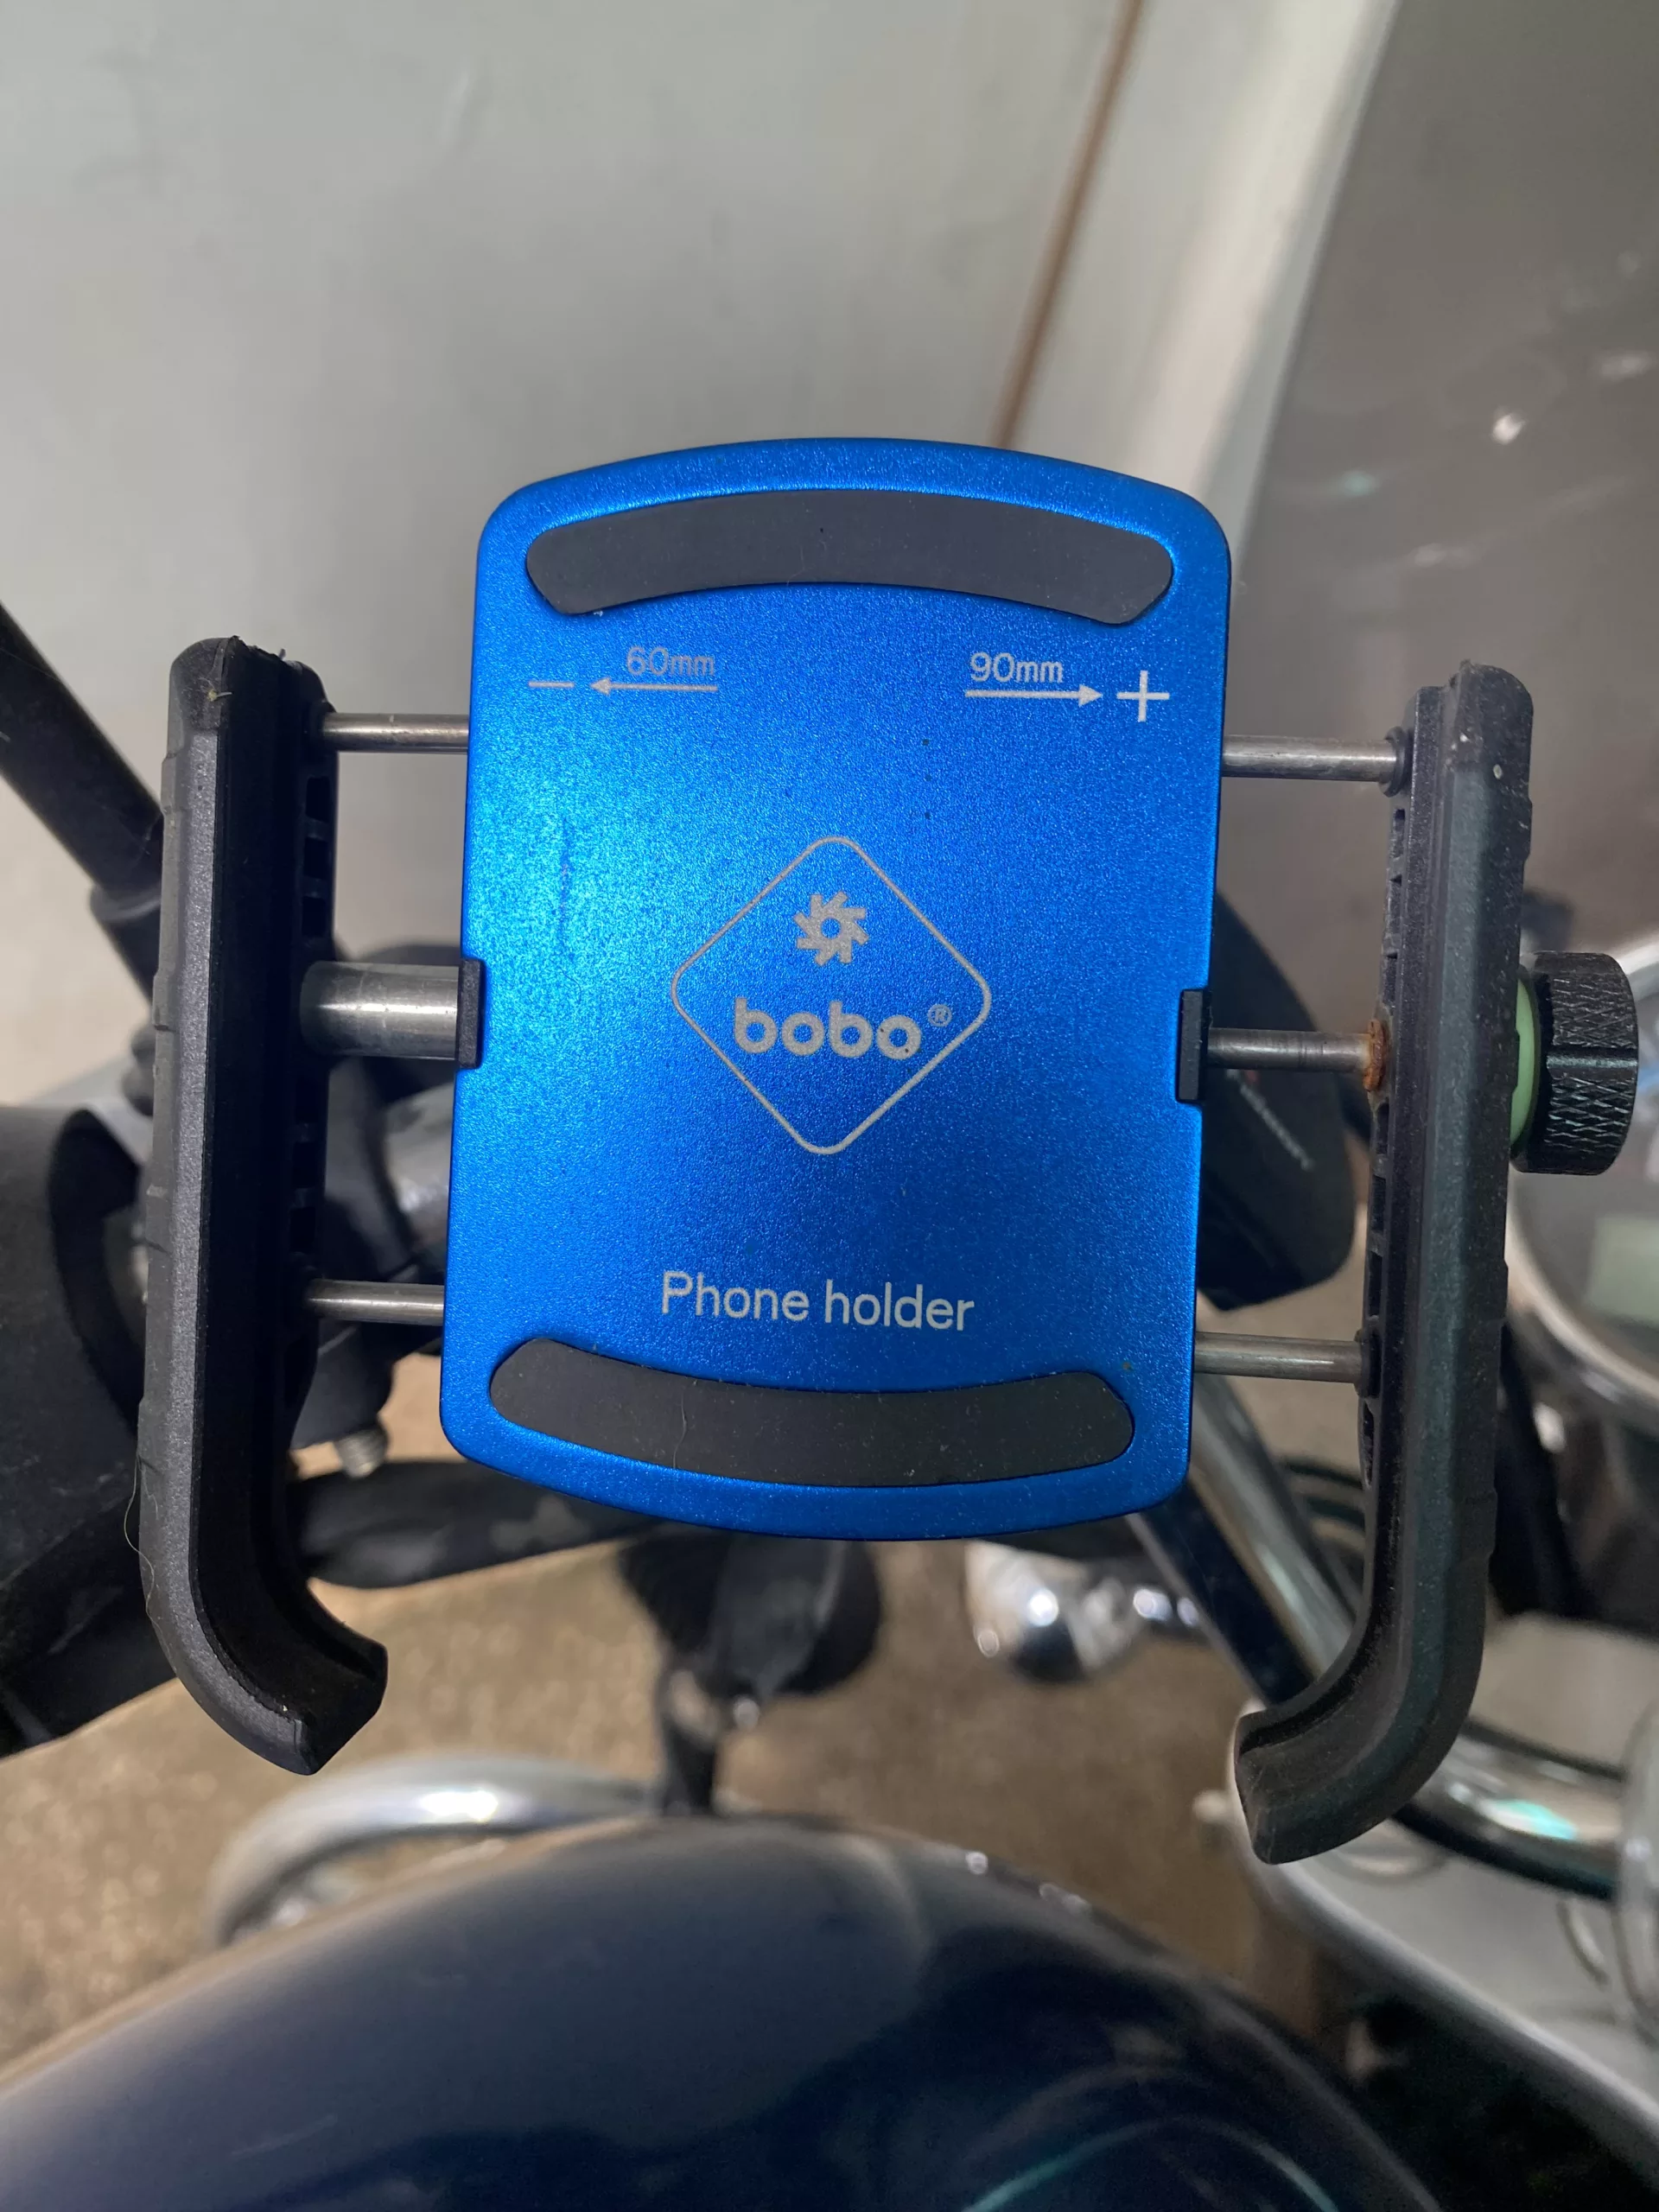

- Mobile holder: Since the majority of us use Google Maps on our mobile phones for navigation, you can fix your mobile holder on your handlebar for navigation. This way, it will be easy for you to use your mobile phone while riding to navigate without getting distracted from the road.
- Charging socket for bike: When we use our smartphones for navigation, it comes with a consequences: the battery of your smartphone tends to drain faster, and for that, we need a charging socket. Most bikes now include a built-in USB charging port. If your bike doesn’t have a charging socket like mine, you should buy one. There are many mobile holders that come with a built-in charging socket.
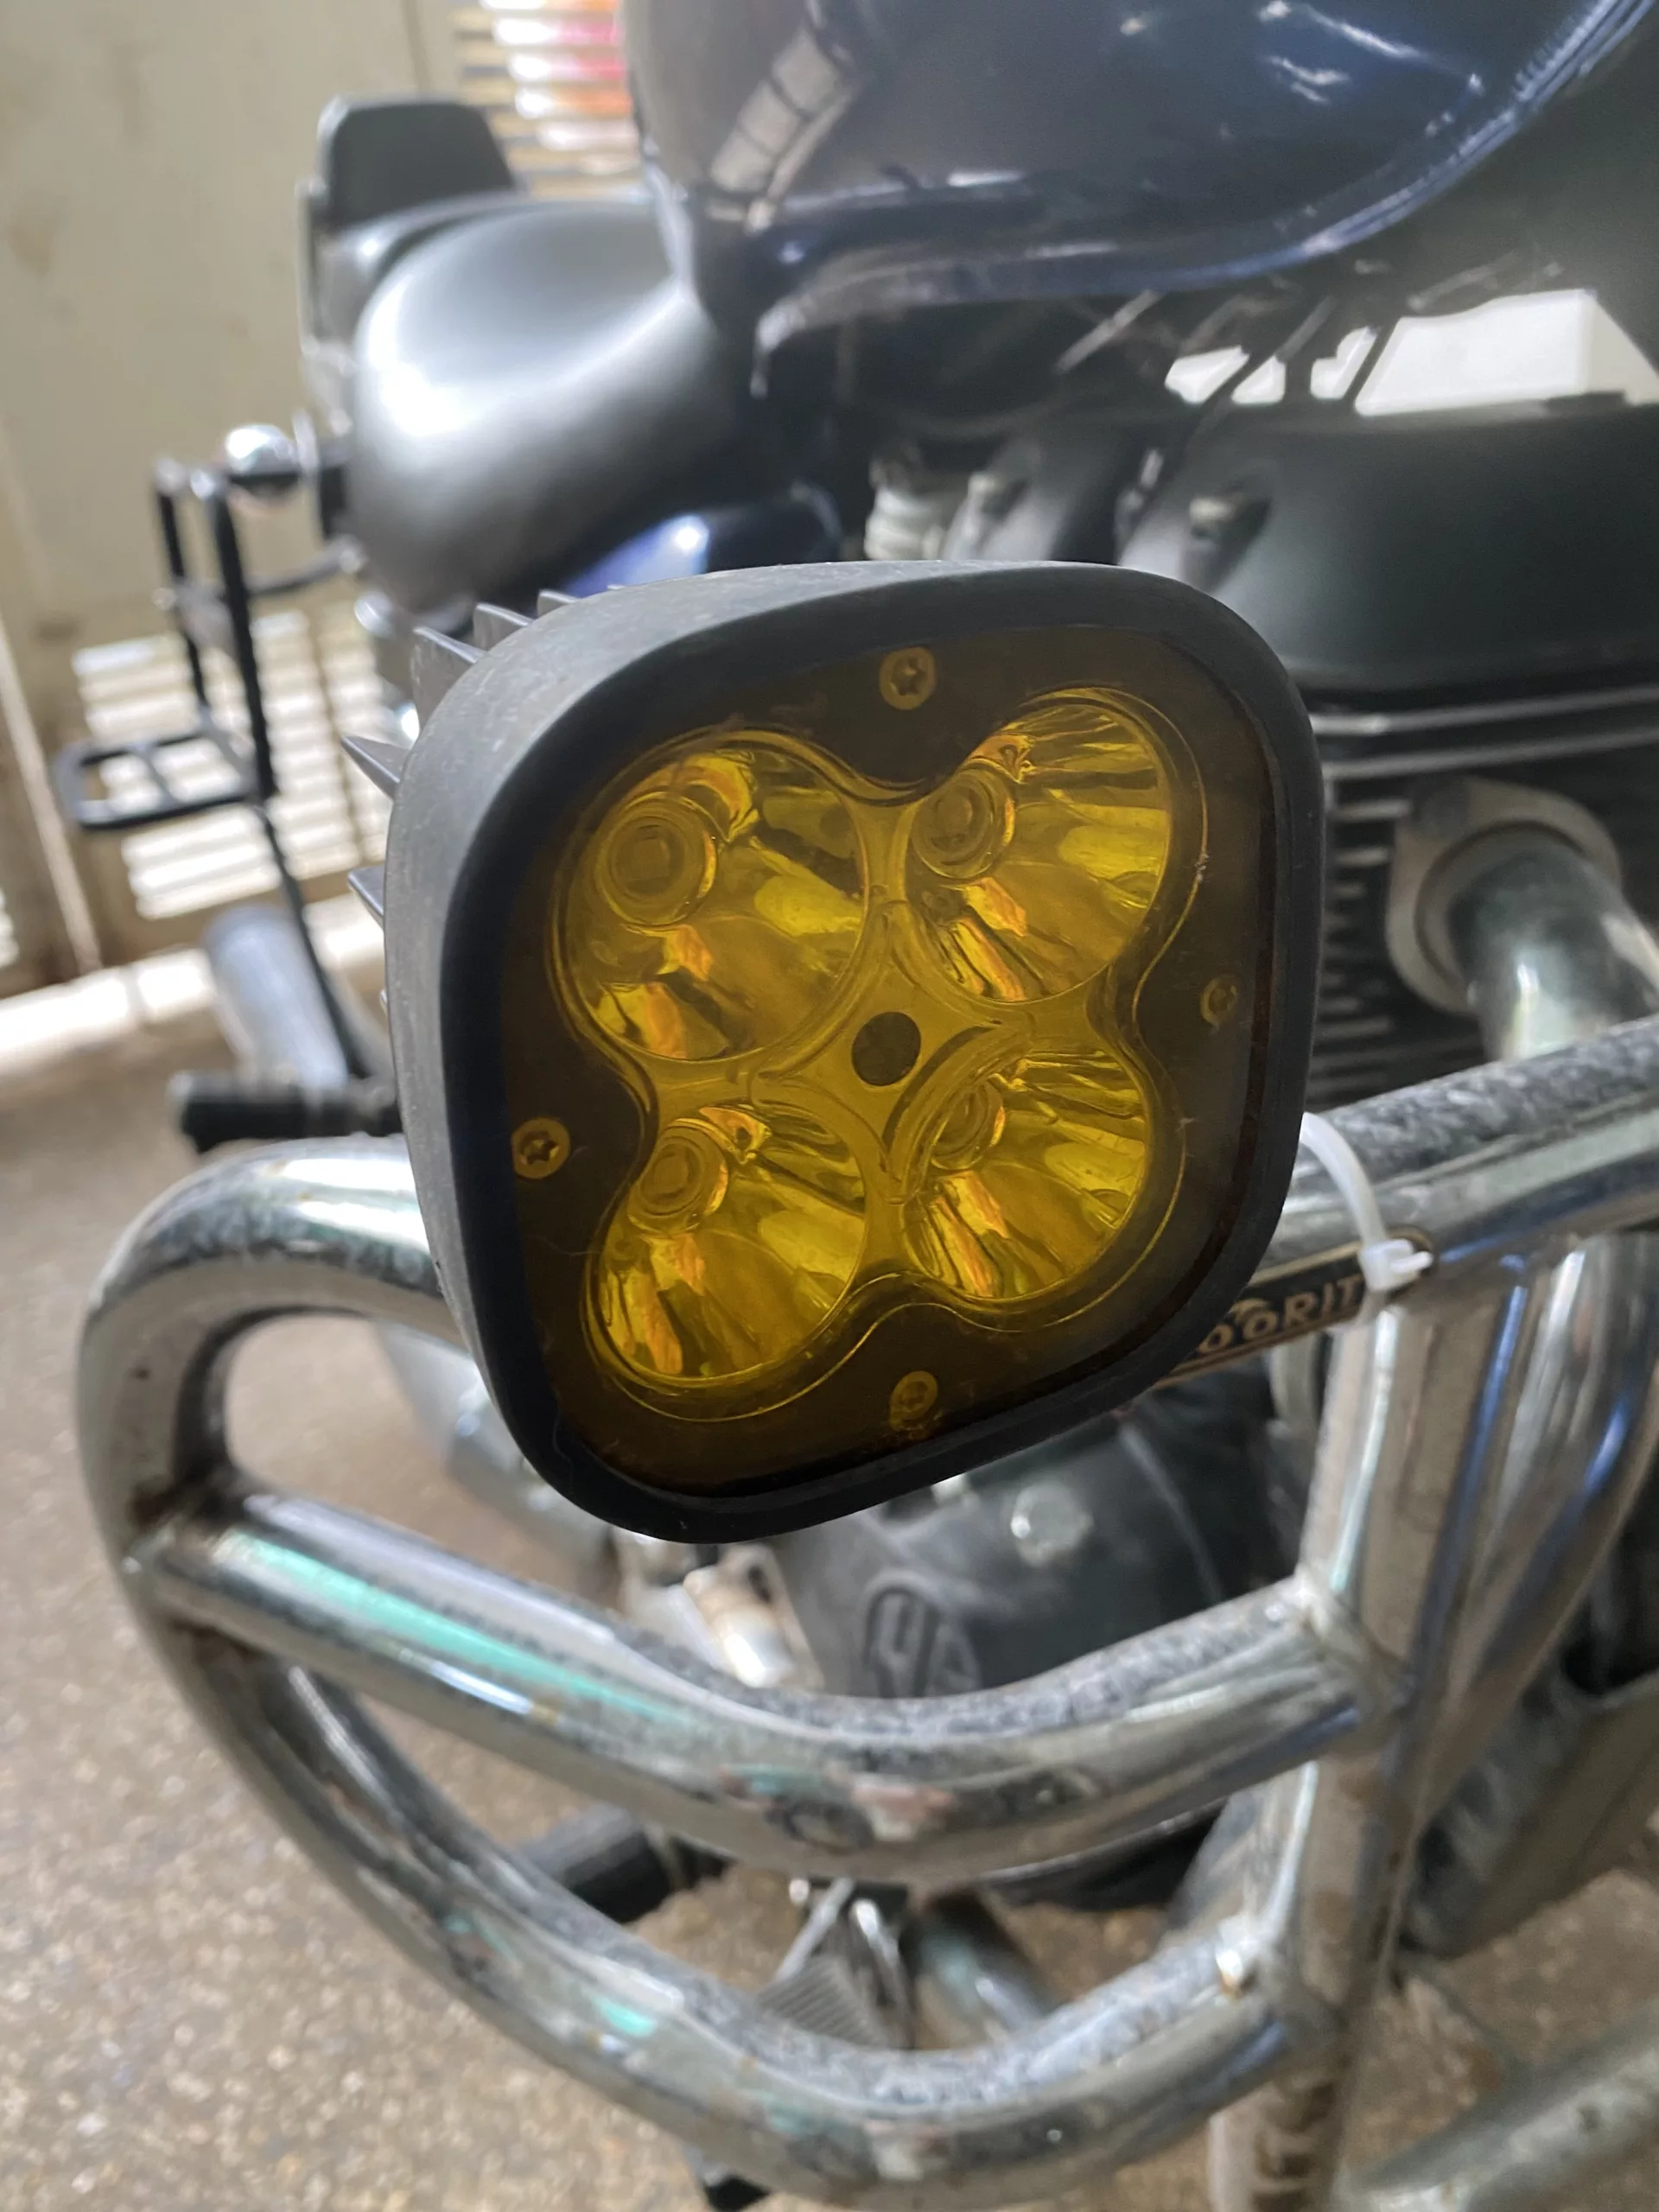
- Auxiliary lights or fog lights: Imagine you are riding long distances and you are just a few kilometres away from your destination. The sun is about to set, it’s getting dark, and your visibility is being affected. In that situation, you need extra lights. Your OEM headlights are not enough; you need some extra lumination to light up the road for better visibility (ensure local laws related to fog lights).
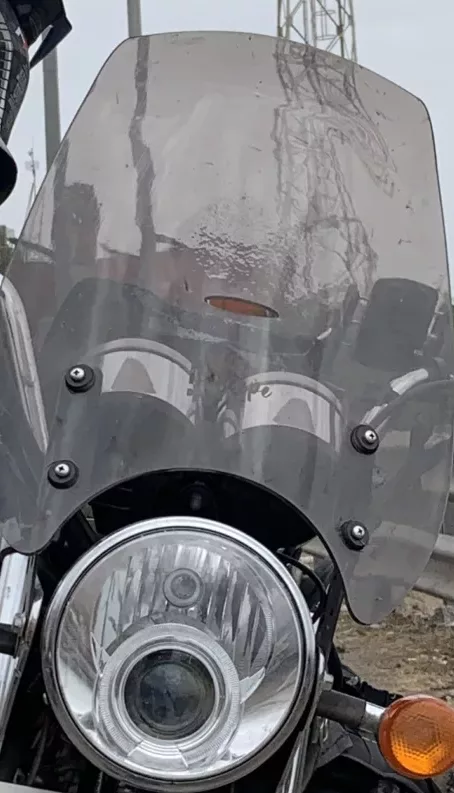
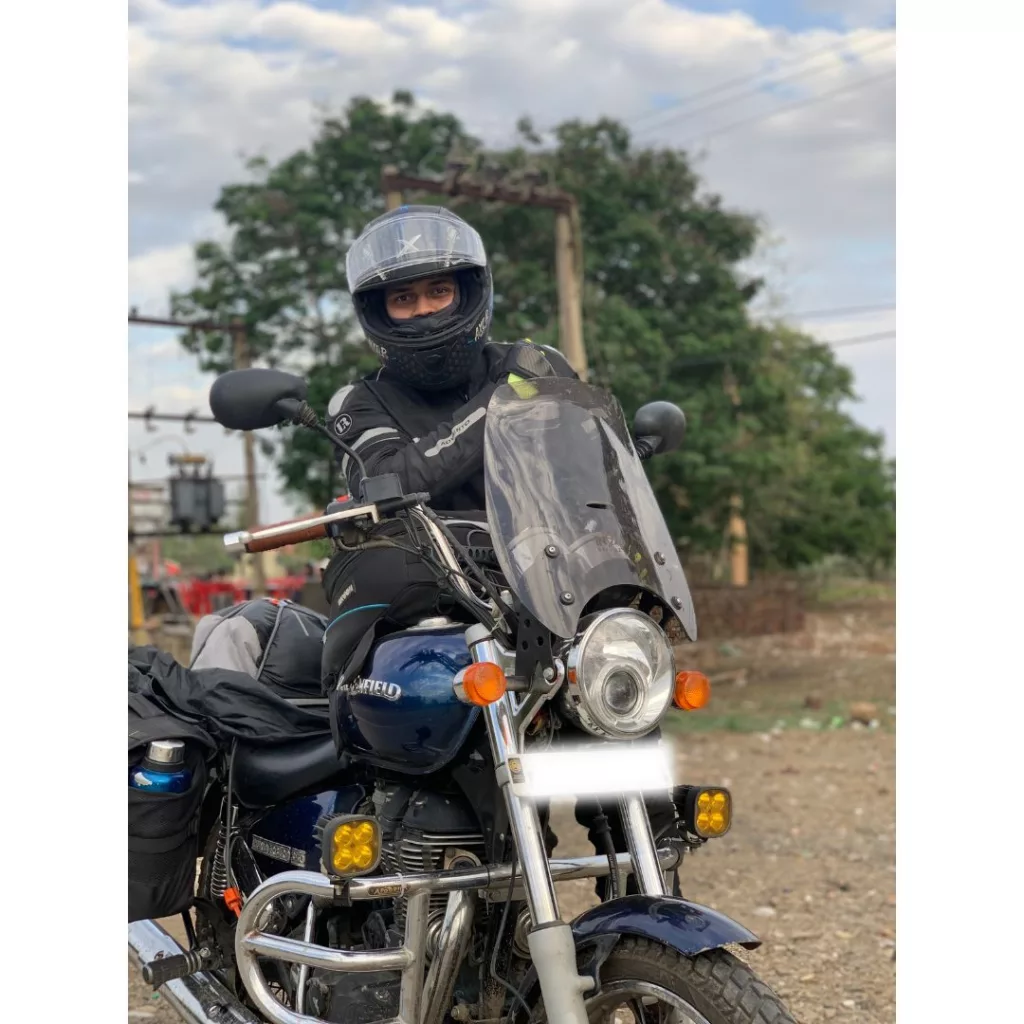
- Windshield: When you are travelling long distances, the wind blast coming from high-speed runs will push you and make you more tired. A good-quality windscreen will protect you from wind blast, thereby making your ride more comfortable and smooth. Nowadays, most touring bikes come with windshields, but for those that do not, like mine, you should definitely invest in one.
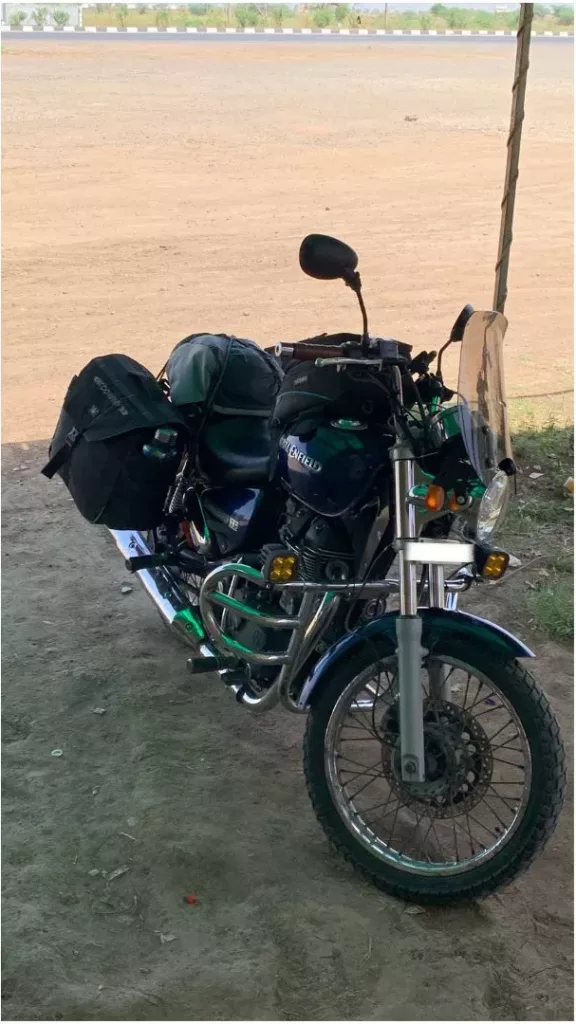
Bike’s Luggage system
When it comes to bike’s luggage system we can divide it into two major categories:
Hard Luggage and Soft luggage.
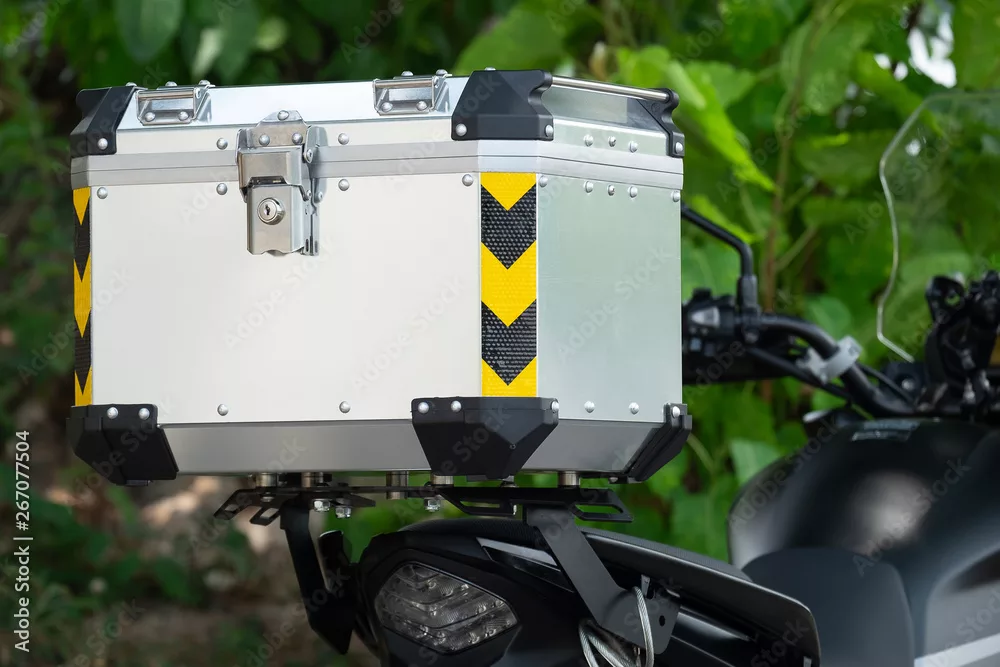
Hard Luggage: It includes Top box and Panniers.
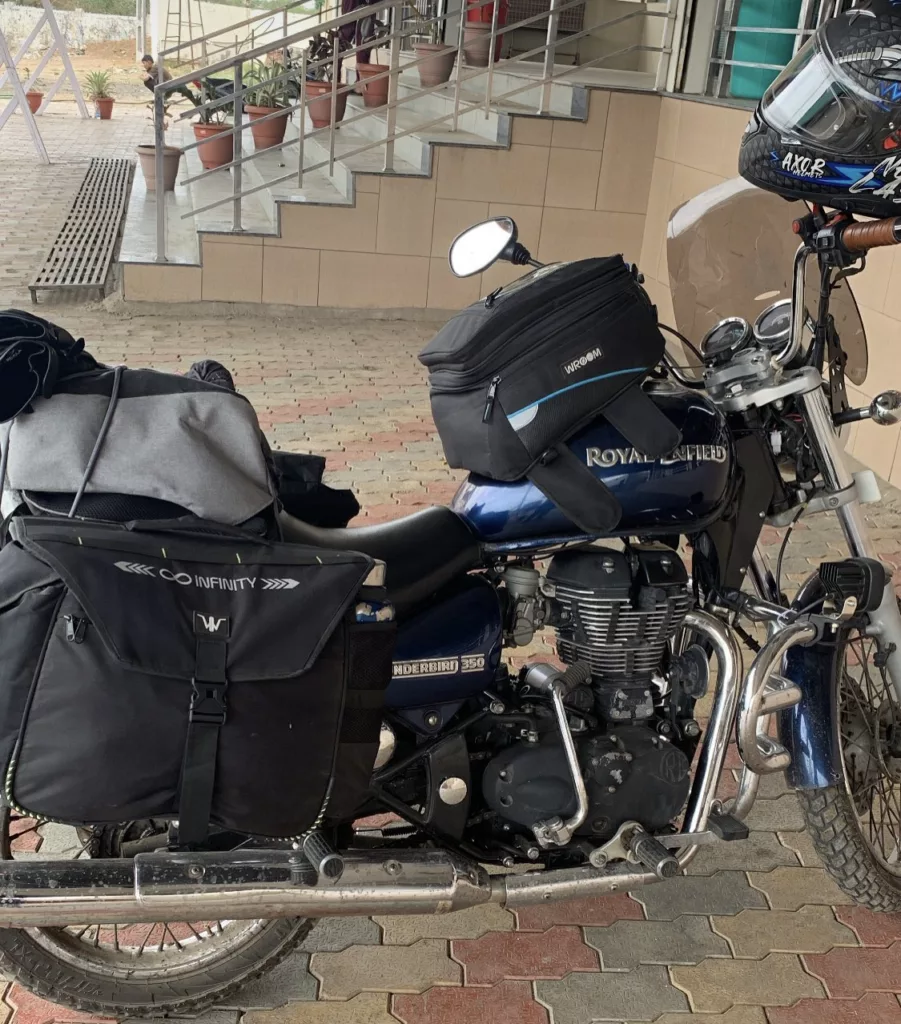
Soft luggage: It includes saddle bags, tail bag, utility bag and tank bag.
While there is a long going debate on Hard luggage vs Soft luggage, for this blog we are not touching on this topic.
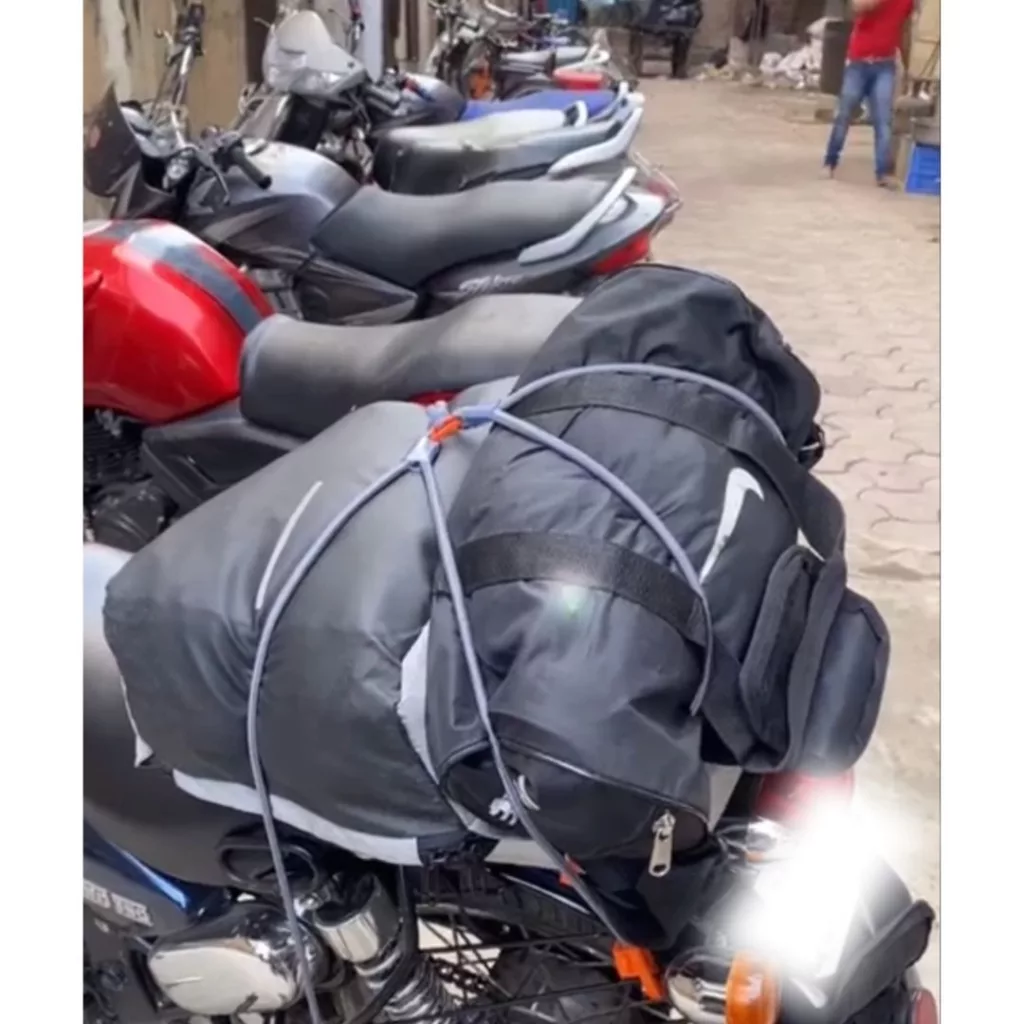
When I went bike touring for the first time, I used soft luggage. Since then, I haven’t had any reason to shift from soft luggage to hard luggage. Here is a list of soft luggage that you can use:
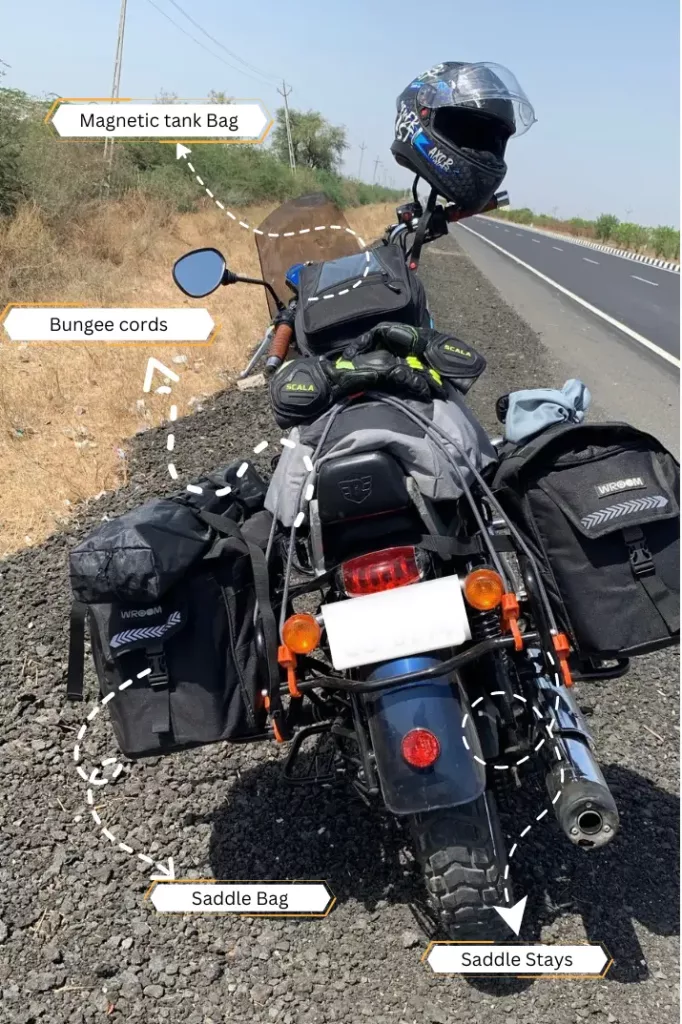
- Saddle bag: Saddle bags sits on sides of your bike therefore it is generally recommended when you’re travelling with a pillion. Saddle bags has more luggage storing capacity.
- Tail bag: Tail bag sits on your pillion seat, therefore it’s best for those who like to travel solo or without pillion.
- Tank bag: As the name suggest tank bag sits on your bike’s tank. There are two types of tank bags; magnetic and non-magnetic, if your bike has metallic tank then you can buy magnetic tank bag, if not then non-magnetic tank bag will come in handy. Tank bag is easily accessible therefore it is generally used to carry stuffs that we require more often such as protein bars, charging cables, camera etc.
- Saddle stays for Saddle bag: As mentioned earlier that saddle bags sits on the sides of your bike for that we require saddle stays so that your bag does not touch your bike’s exhaust and rear tyre.
- Utility bag: As the same suggest utility bags are for your utility items such as chain lube or chain clean, cleaning cloth etc.
Saddle bag vs Tail bag: Everything has its Pros & Cons
Saddle bag sits on the sides of your bike, leaving space for pillion rider, where as tail bag works as a good backrest (believe me you’ll love it when you’re riding for longer distances).
As tail bag sits on your pillion seat sometime it will get difficult to hop on bike especially when you are wearing your riding pants and have ridden your bike for longer kilometres. On the other hand saddle bag increases the area of your bike so you need to be cautious when overtaking.
Bike repairing skills you need
When I was preparing for bike touring, I was so confused when I heard that you need to know “how to repair your bike”, What do you mean by repairing your bike? Do I need to know all the stuff? Well, you don’t need to go all mechanic; just the basics, and by basics, I mean:
- Changing your bike’s fuse: Imagine you are going for a ride and everything seems to be going smoothly, and suddenly your bike is dead; the meter, headlight, horn, and indicator stop working. I found myself in a similar situation when I was riding with my group. Fortunately, one of the group members knows exactly what happened: my bike’s fuze blew because of a short-circuit due to a wire cut, so he quickly changed the fuze and sealed the wire, and everything started working again.
- Chain Adjustment: You need to know how to adjust chain slack, as a loose chain may cause loss of transmission power or the chain to come off the sprocket.
- Changing of clutch and accelerator wire: You don’t know when your clutch cable or accelerator cable may give up; fortunately, this hasn’t happened with me. My suggestion is to get it checked by your mechanic before leaving for a ride, but in case it breaks, at least you know how to change it.
- Engine Oil Top-Up: If the level of your engine oil drops, you should know to top it up. It may also depend upon which engine oil you’re using; again, this hasn’t happened with me till now.
- Puncture repair: Puncture, I know it sucks! So if your bike has a tubeless tires, you must know how to repair the puncture through a puncture repair kit, for my tube tyre buddies you can use puncture liquid or sealant.
Remember while going on a long distance ride don’t forget to carry your tool box, which comes with your bike.
What Moto Gear Do I Need? A Checklist of Essential Safety Equipment for Riders
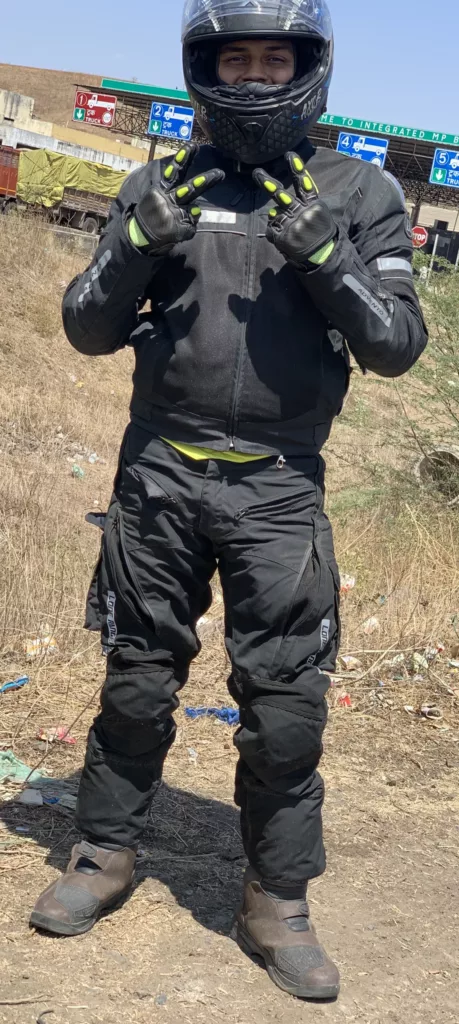
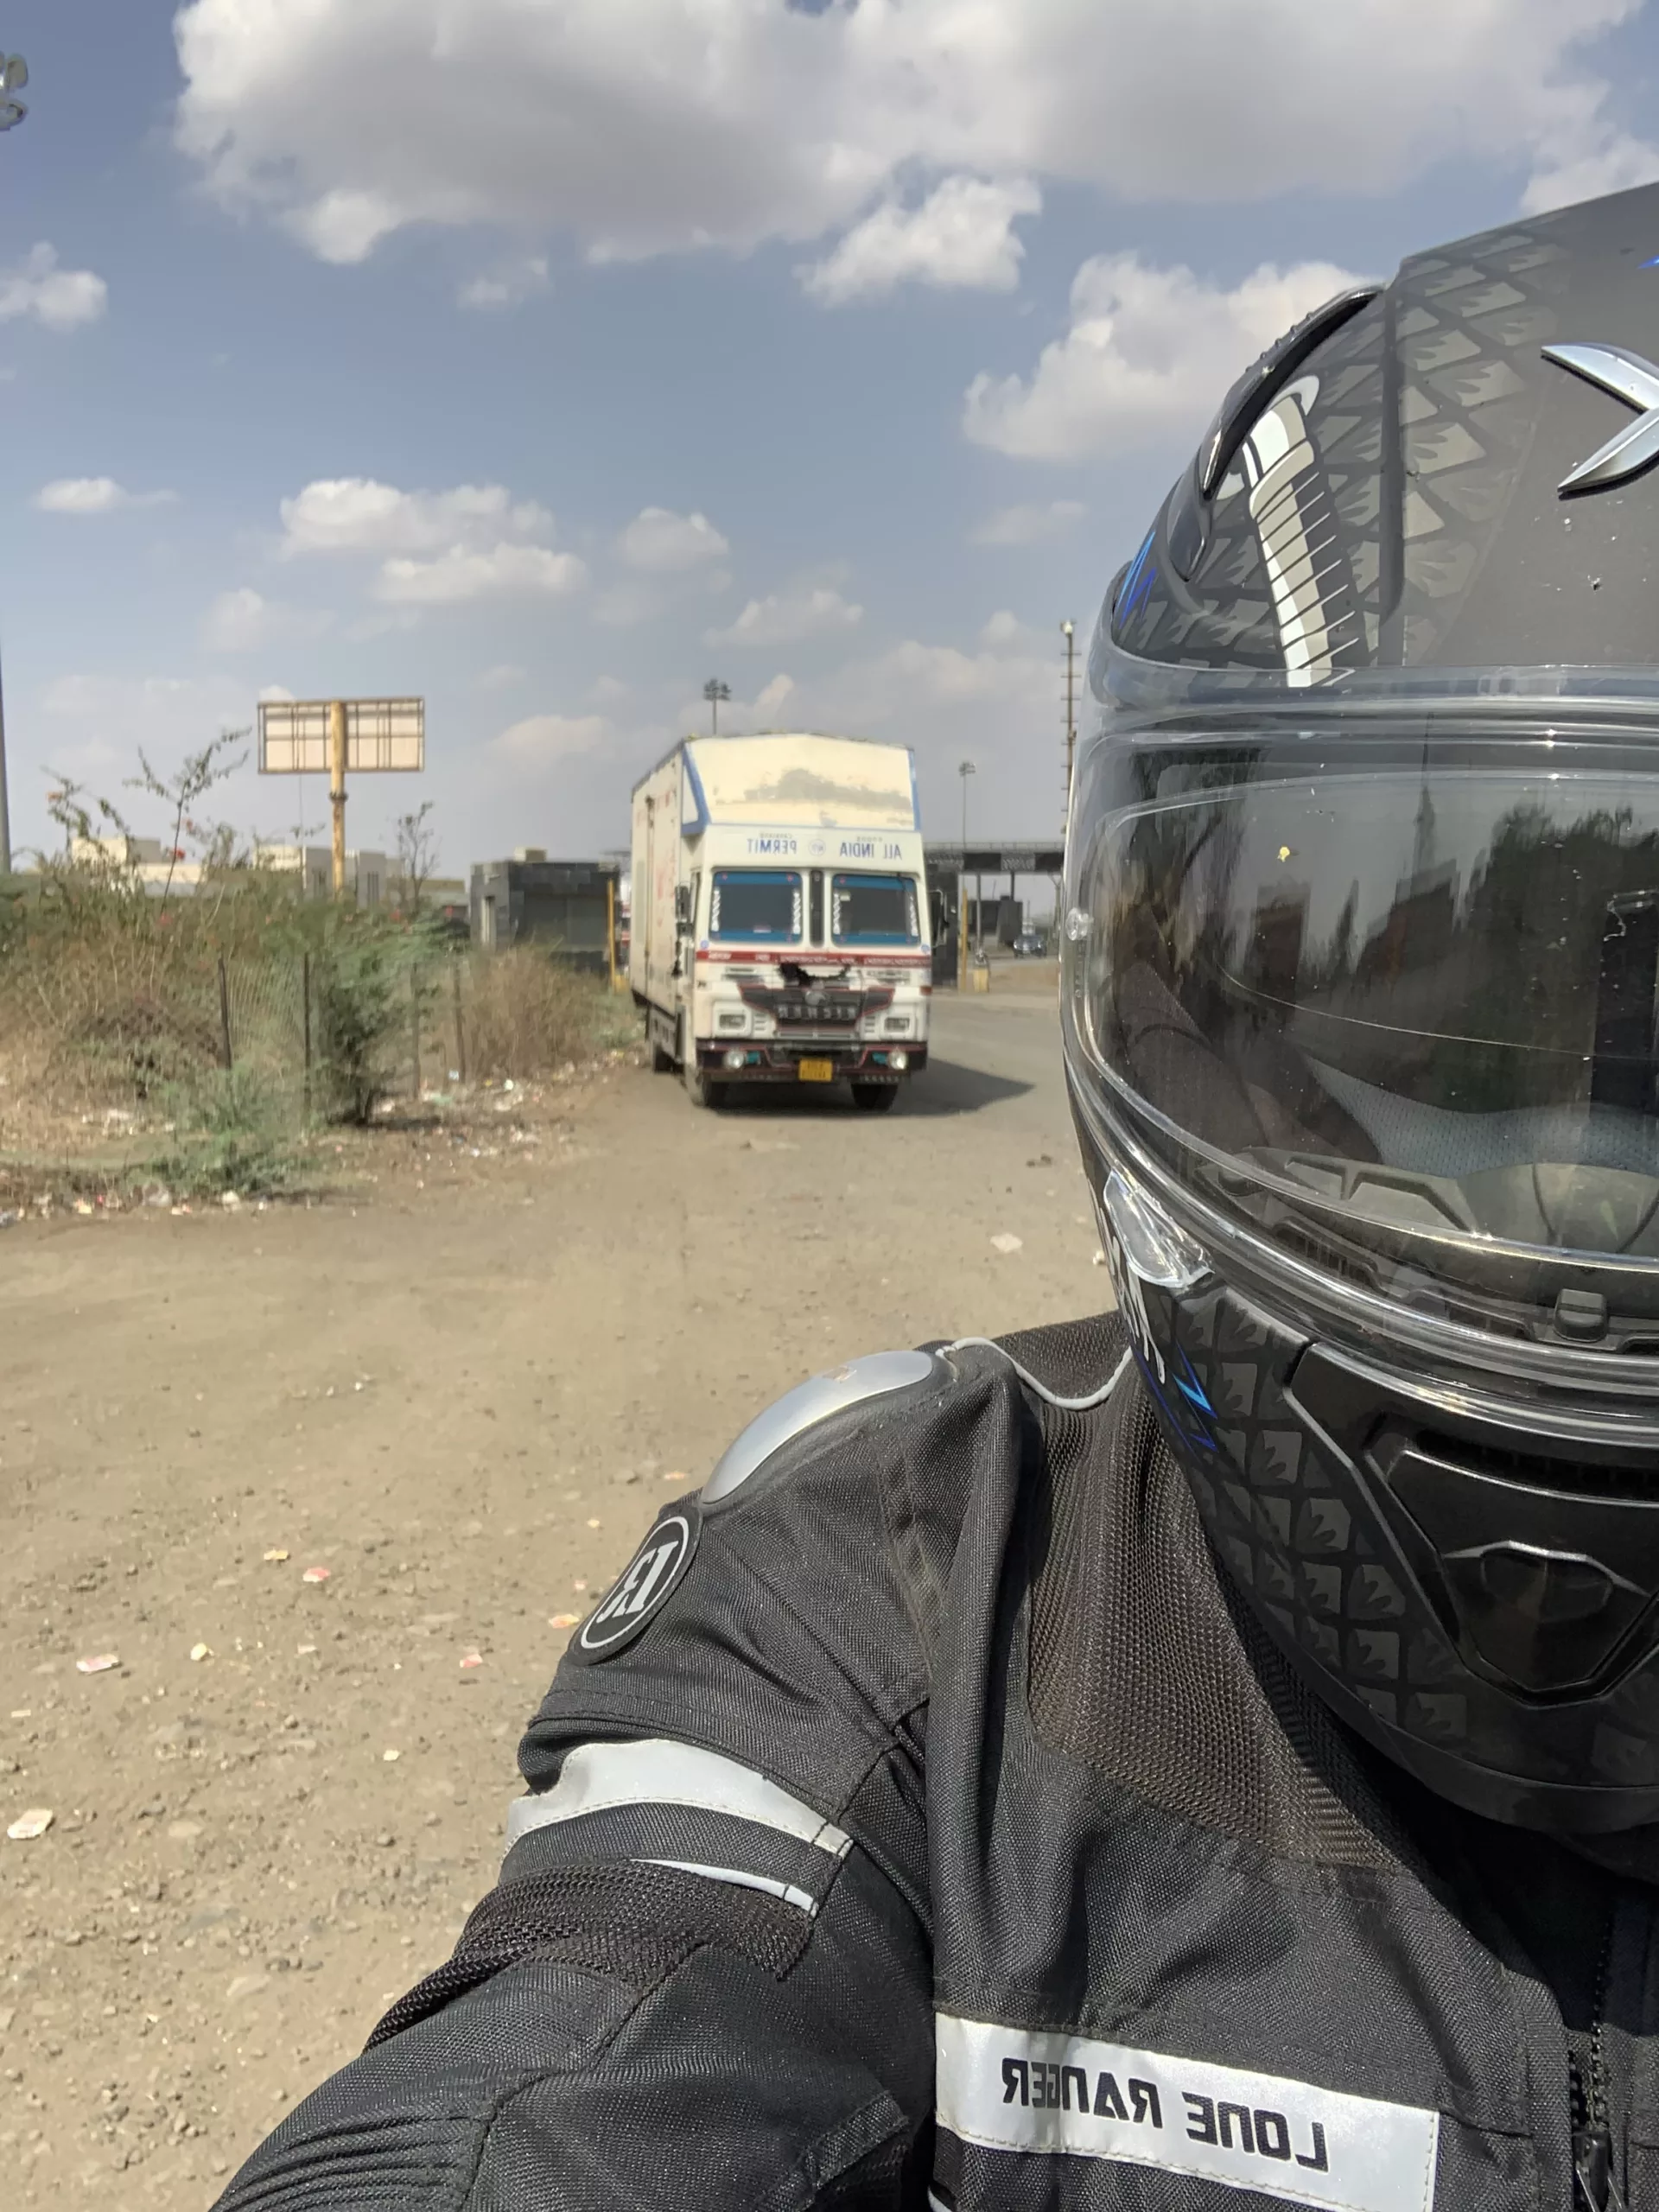
- A good quality Helmet: Everyone should invest in a good quality helmet, and by good quality helmet I mean, it should not be bought from the road side vendors, I cannot emphasis on this enough that you head is the most important thing on your body, your helmet should at least ISI certified, and if you have a budget you should invest in helmet with DOT or ECE certification. Make sure that you buy proper size helmet it should be snug fit.
- Balaclava: Balaclava is the piece of cloth made of DRI-FIT material that you wear beneath your helmet. When you ride for long kilometres you tends to sweat more especially in summers. Balaclava will absorbs all your sweat and makes your ride comfortable. Also your helmet will slide in smoothly with balaclava.
- Riding Jacket: There are multiple riding jackets in the market from sports to adventure touring, the jacket will protects your elbows, shoulder, chest(depending upon the price) and back. As a beginner you can invest in CE-Level 1 Riding jacket, but eventually when you start touring frequently you will need CE-Level 2 riding jacket. CE-level 2 riding jacket will provide more protection incase of impact. My recommendation will be to opt for CE-Level 2 jacket.
- Riding pants: Riding pants also comes in variety from sports to adventure touring. A good riding pants will protects your knees, hip and tail bone. Riding pants also comes with CE-Level 1 and CE-level 2 protection. As your budget increases the protection level also increases. Personally I use CE-Level 1 protection pants.
- Base layer for jacket/pants: As riding jacket and riding pants are made from abrasion resistance material, wearing it directly can be uncomfortable. With base layer your jacket and pants will slide in like a hot knife in butter, being made up of DRI-FIT material it also helps in absorbing sweat especially during summer rides.
- Riding gloves: In case of impact people tends to strech their hands to prevent them from falling it’s a general reflex, a good quality riding gloves will protect you palm, wrist, knuckles and fingers. Their high abrasion resistance material will prevent the glove from tearing incase of sliding.
- Riding boots: Riding boots are the most neglected part of riding gears, when I started bike touring at that time I was not aware of the importance of riding boots so I used to wear military boots and that is majority of people do, but if your budget allows you should definitely invest in a good quality riding boots. Incase of an impact a good quality riding boot will protect your shin bone, toes and prevents your ankle from being twisted.
I agree riding gears are expensive but our life is priceless. I know most of us don’t have the budget to invest in one, so alternatively you can also use knee and elbow guards and when your budget allows you should invest in good quality riding gears.
Disclaimer: Elbow and Knee guards is not a substitute for a riding jacket and riding pants.
Convincing your parents for bike touring
“NO”, They said
“But Why?” I asked
“It’s too risky, we have only one son” They said
“I will be careful I promise” I said
“No means No end of discussion” They announced
I still remember the conversation I had with my parents when I was preparing for bike touring at that time I didn’t knew what to say to convince them.
“So how did I do that?” “How did I convince my parents for bike touring?”
Well it’s a very subjective matter but what I learnt from my and my fellow rider’s experience is that we need to make sure that our parents feel safe about the idea of travelling long distance on bike.
I showed them bunch of YouTube videos so that they get the idea what is it all about, my riding gears played a great role in convincing them, I showed them my riding gears and educate them about the safety they provide explaining each and every detail of it.
We need to understand that our parents wants to protect us it’s their way of loving us, so we need to respect that I mean how can we actually enjoy our trip when our parents at home are mad and worried about us right?
After a brief conversation and explain them about the gears, they agreed for a short-distance ride, one after another I continued doing short-distance rides and gained their confidence that I can take care of myself and now I can go for long-distance ride without worrying about them.
To conclude, you need to familiarise our parents with idea of bike touring and how you are going to protect yourself when you are riding, it may take some time to convince them but eventually they will agree.
That’s it that’s how you can convinced your parents for bike touring for the first time.
Prepare Your Mind and Body for Your First Bike Tour
You might be wondering, “Well, I have my riding gear, my bike is properly serviced, and my parents agreed, so I guess I’m ready to go now, right?” False. While it’s true that you have all the necessary riding equipment, your bike has been properly maintained, and your parents have given you permission, you still don’t fully understand your body’s and mind’s capabilities.
In my opinion, bike touring is an adventure sport, and just like any other sport, it requires mental and physical preparation before you can actually participate.
When I started bike touring at that time, I made a mistake and went on a ride without any prior preparation, though it was a short ride compared to the rides I do now, but for the person who is planning to ride a bike for more than 200 km for the first time, it was a big deal. Therefore, here I will talk about “How to Prepare Your Mind and Body for a Long Distance Ride” so that you guys can avoid the mistake I made.
- Short-rides: Before going on a long-distance ride, you should start with multiple short-distance rides. As you are just starting to tour on a bike, you don’t know your riding capacity—how many kilometres you can ride in a stretch? so its important to do multiple short-distance rides this will help you know your limits.
- Exercise regularly: You need to have a good physique to go on a long-distance ride. No, I don’t want you to have six-pack abs (you can if you want), but just a little bit of basic exercise will help. Bike touring demands lots of physical endurance, especially when you are riding for long distances; therefore, by regularly exercising, you can prepare your body to ride for longer distances without aches and pains.
- Watch your meals: Avoid eating heavy food when you are travelling, as it may upset your gut. When you eat heavy food, all the energy in your body is diverted towards your gut to digest it, resulting in you feeling sleepy. Also, make sure to drink plenty of water, especially in the summer, to keep you hydrated.
Let us now proceed to the planning stage.
When you are planning for bike touring, questions like Which route should I take? How much should I spend on travel? What should I pack? can come to our minds.
As you are going to travel on your bike for the first time, you should properly pay attention to the route you’re taking to reach your destination. Is it safe to travel at night on this route? In case your bike breaks down, will you get any help?
When I did my first long-distance ride, I failed to properly plan my route, resulting in my being about to take a road that was infamous for burglaries. Fortunately, I inquired about the road when I was taking a short break, and that’s when I learned about the mistake I was about to make. Lack of proper route planning also caused me to leave a few scenic sites, and I had to spend more than my budget.

We have to accept the fact that, when it comes to navigation, we are dependent on Google Maps. Sometimes Google Maps will take you on roads that are not safe or divert you from the main highway to local roads to save you time. To avoid this type of mess, I instead navigate directly to my destination. I break down my route into parts from one major city to another. For example, if I am planning to go to Ahmedabad from Bhopal, I will put Ahmedabad on Google Maps and note down the major cities that will come on my way and travel from one city to another, so in this case, first I will travel to Indore, then to the next major city, Dhar, and so on. This way, it will help you stay on the main highway and avoid city traffic and local roads.
Packing your stuff for bike touring
Let’s face this as we are travelling on a bike we have very limited space, we need to pack all our essential items, therefore we need to pack our luggage efficiently. When I started bike touring at that time I did not had any saddle bag or tail bag with me so I used my old school bag and my small gym bag to carry my clothes and I tied it down with the help of bungee cord
What should I pack for my bike trip?
To know what you should pack for your trip, you need to answer, “Where is your destination, how much time are you going to spend, and what is the weather condition there?” You need to pack accordingly. For example, if it rains a lot where you’re going, you need to pack your rain gear as well as some extra clothes. If the place you’re going is cold, you need to pack more warm clothes.
Recently, I learned a lesson. When I was on my solo ride to Gujarat, the trip was planned for 10 days, so I packed my clothes accordingly, but I did not consider that the majority of my time would be spent riding wearing all the riding gear, resulting in half of my clothes being returned as they were. For the entire trip, I was overpacked, and it was making my bike heavier.
How should I pack for my bike trip?
When I started bike touring at that time, I used to fold my clothes in a traditional way. The traditional way of folding clothes tends to take up so much space.
As I said earlier, we are travelling by bike, and the space we have with us is limited, so we need to pack our luggage in a way that we can avoid overpacking, as it will make your bike heavier, and we also need to save space for our essential items as well. So how should you pack your luggage?
Make sure that your luggage takes up as little space as possible. Personally, I prefer the army roll to pack my clothes; it takes much less space compared to our traditional way of folding clothes. You can learn to do the army roll from this YouTube video.
You can also use compression bags or packing cubes to save space. Packing cubes makes your luggage more organised, so you can quickly access the stuff you need.
Let’s talk about a touring budget
A touring budget is made on the basis of how many days you’re planning to travel. How many kilometres are you going to cover? And how much mileage is your bike giving you?
These questions will help you prepare your basic budget. Personally, I decide my touring budget on the basis of the following variables:
- Cost of fuel: how many kilometres I am going to travel and the mileage my bike is giving Based on this, I estimate my fuel cost.
- Cost of Accommodation: The number of days I am planning to travel and how much I am willing to spend on accommodations help me plan my accommodation cost.
- Cost of Food: Based on the number of days I am planning to stay and the maximum amount I am willing to pay for a meal, I calculate my cost of food.
- Cost of tickets or passes: Before travelling to a destination, make sure to do a proper research about that place. Are there any tickets or passes you need to travel to that destination? Include this cost in your budget.
Bike touring: Bonus tips

Here are a few extra pointers to get you started on bike touring for the first time.
- Start early: Always set out on your ride in the morning so that you can cover as much ground as possible during the day. Avoid riding at night because visibility is very poor. Start your journey before sunrise if you wish to go on a ride in the dark. You can complete the ride in this manner before dusk.
- Avoid riding in bad weather condition: As it increases the risk of mishaps due to poor visibility, you should try to avoid riding in bad weather conditions.
- Be conscious of your surroundings: As I previously stated, bike touring is an adventure sport, and we never know what will happen in the next minute, so being aware of your surroundings will help you avoid unnecessary dangers.
- Don’t Push beyond limits: Yes you read that right, I know this sounds contrary to the proper believe ”push beyond your limits”, but in riding pushing beyond your body’s capacity will increase the chances of mishaps and we don’t want that right!
Conclusion
If you’re embarking on your first bike touring adventure, it’s crucial to consider several key aspects. Firstly, ensure that your bike is in excellent condition and ready for the journey ahead. Next, focus on both mental and physical preparation to handle the challenges you may encounter. Don’t overlook budgeting for expenses as well. Properly plan your route and keep your loved ones informed about your plans for added safety.
With these helpful tips, you’ll be all set to embark on a thrilling long-distance bike touring experience! As a fellow beginner, I’m eager to learn and share experiences with all of you. Let’s remember to ride hard, but most importantly, ride safely. Feel free to share your thoughts and questions in the comments section.